Table of Contents
ToggleReact Native
In this article you will learn how to set up your computer to begin developing apps using React Native.
Before we begin, what is React Native? As stated on the official React Native website, http://facebook.github.io/react-native/, “React Native lets you build mobile apps using only JavaScript. It uses the same design as React, letting you compose a rich mobile UI from declarative components.” The site goes on to say, “With React Native, you don’t build a ‘mobile web app’, an ‘HTML5 app’, or a ‘hybrid app’. You build a real mobile app that’s indistinguishable from an app built using Objective-C or Java. React Native uses the same fundamental UI building blocks as regular iOS and Android apps. You just put those building blocks together using JavaScript and React.”
You can learn more by reading the documentation at http://facebook.github.io/react-native/.
One important thing to keep in mind, is that, although React Native allows you to develop iOS and Android apps, you will need to have a Mac computer to build an iOS application.
Setting Up Your Computer
Depending on your experience, skills and what you plan on doing, you may either want to develop with Expo or with the React Native CLI. What’s the difference?
Expo is the easiest and quickest way to get started and build simple apps. There is no need to use Xcode or Android studio, simply use the Expo CLI to develop your app and run it on your phone using the Expo client app.
React Native CLI, on the other hand, allows more flexibility and control. With it you can do things, such as, using third party packages that require you to run the command “react-native link”. It also allows you to go in and make changes to native iOS and Android code. But the installation process will vary depending on the operating system your computer is running. Window users be aware that you will not be able to build iOS projects because iOS development requires a Mac. On the other hand, Mac using will be able to develop for both iOS and Android.
I will be walking you though, both the Expo and React Native CLI installation. Let’s begin with Expo. If you prefer Reactive Native CLI, please skip ahead to the Reactive Native CLI installation section.
Expo Installation
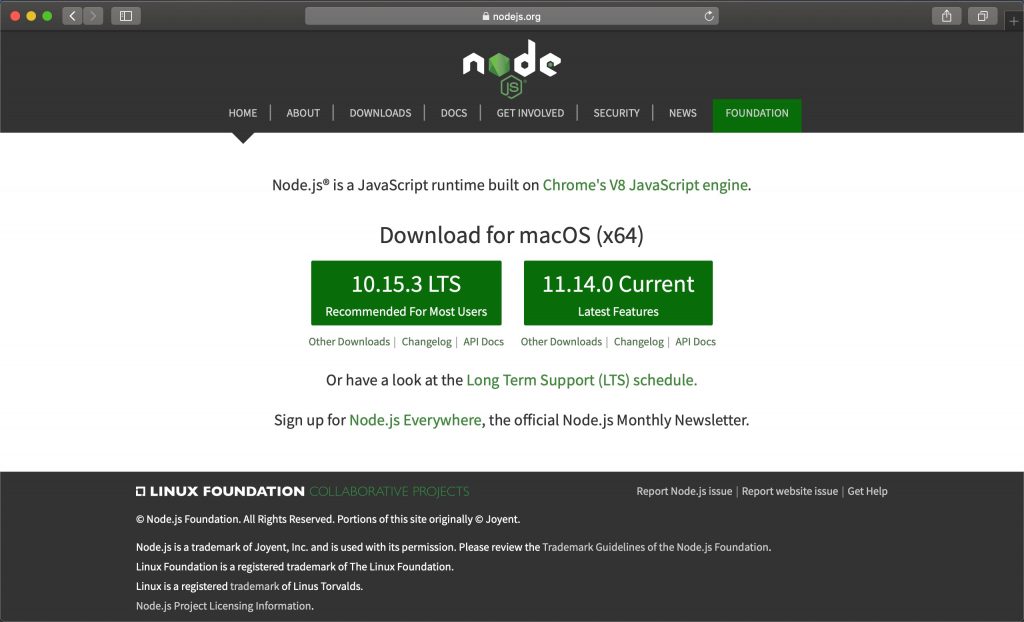
To use Expo, you need to install Node. The fastest and easiest way to install Node is through the website. Head to http://nodejs.org and choose a version. LTS is more stable, more likely to work, and the recommended option. Current is the latest version of Node but may not work with React Native. Choose one, download it and follow the instructions to install. Node will also install npm. Using the Node website will work for both Mac and Window users.
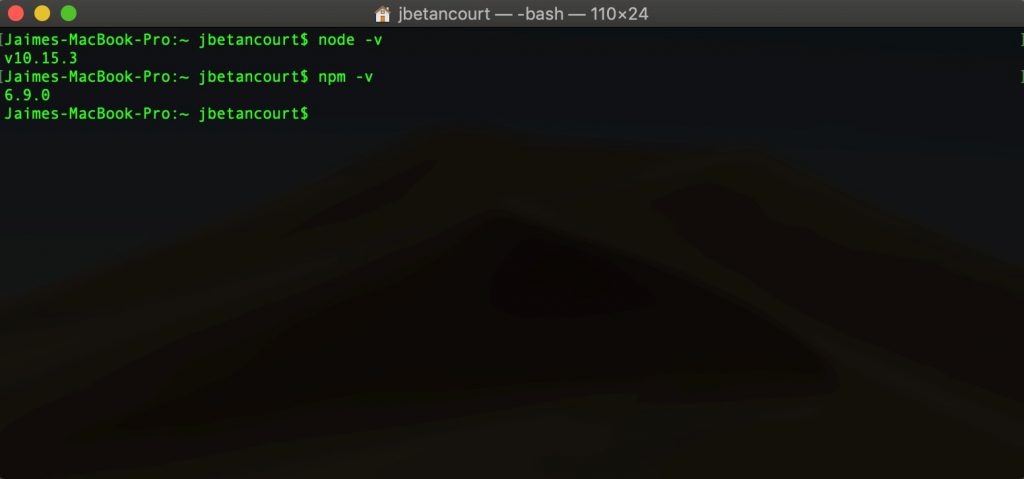
Once installed you can check the version of Node by opening the Terminal or Command Prompt and type the following and then press the “Enter” key:
node -v
Node will also install npm, to check the version type:
npm -v
If you are unsure how to open Terminal or Command Prompt, here is how to do so:
To open the Terminal on a Mac, open the Applications folder, then the Utilities folder and click on Terminal. Or press “Command” and ‘space” keys to open Spotlight and search for “Terminal”, which will be under “Application” section.
To open the Command Prompt on Windows, search for cmd in the Start menu. Or press the “Windows” and “R” key to open the Run window and search for “cmd”.
Version used in this article:
Node version = v10.15.3 and npm version = 6.9.0
Next install the Expo CLI command line utility. Do so by typing the following into your Terminal or Command Prompt:
npm install -g expo-cli
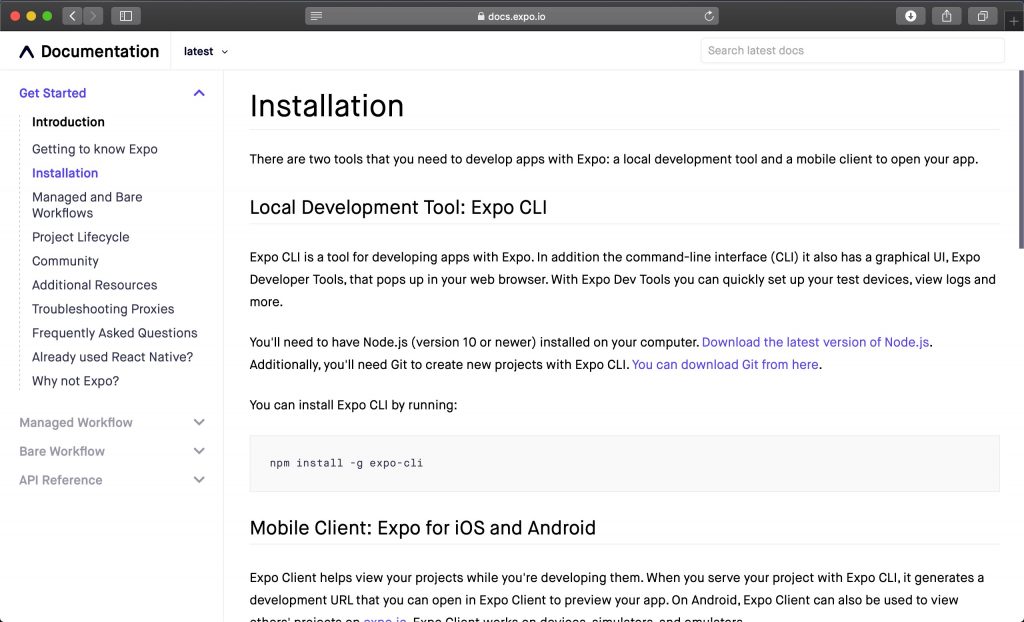
The next step is not mentioned in the React Native documentation, but the Expo documentation states that you will need Git on your computer to create projects. The link to Expo’s installation documentation is located here.
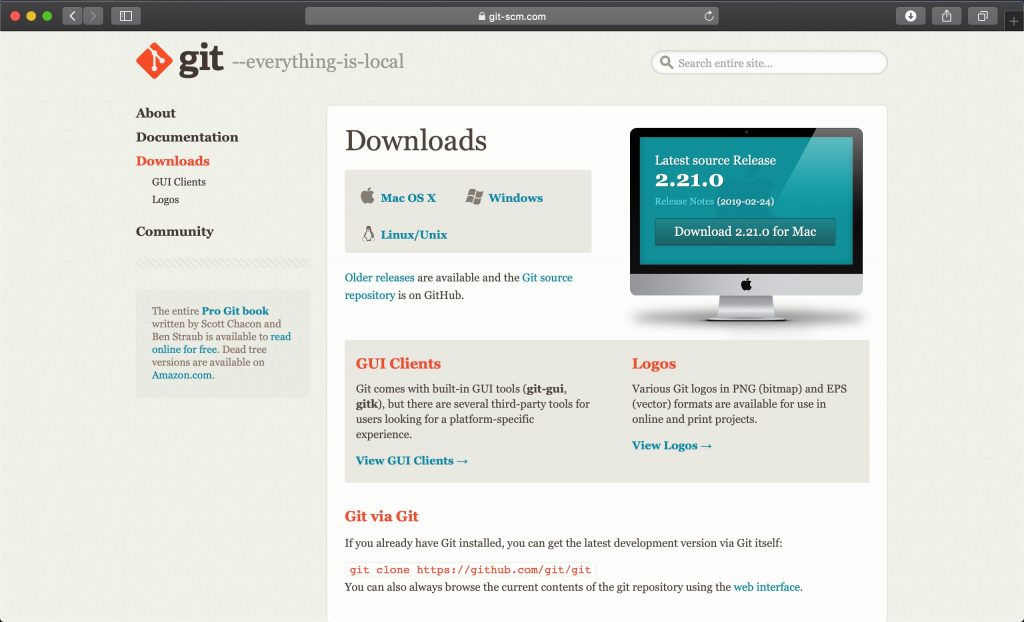
You can download Git here, http://git-scm.com/downloads. Download the correct version for your computer.
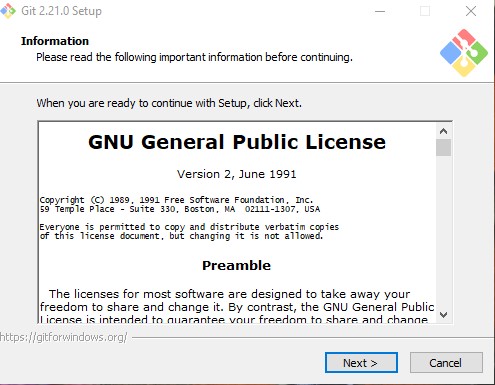
Start the Git setup. The Mac and Windows installation process differ. The Windows setup offers much more options than the Mac setup. I am not a Windows user, so I left all the settings as default and installed. You may need to restart your computer afterwards.
(Git installation on Windows)
The final step is to install the Expo client app on your phone.
Download the Expo client app for iOS from the App Store, http://itunes.apple.com/app/apple-store/id982107779. Or search for “Expo Client” in the App Store.
Download the Expo client app for Android from the Google Play Store, http://play.google.com/store/apps/details?id=host.exp.exponent&hl=en_US. Or search for “Expo Client” in the Google Play Store.
Having an Expo account will open up a few more options, such as publishing projects to your Expo portfolio. You can create an Expo account through the app or through their website, http://expo.io/. This step is optional.
React Native CLI Installation
React Native CLI has a series of steps that will vary for Mac and Window users. I will start by guiding you through the steps for those using Mac, then for those using Windows.
Mac Installation
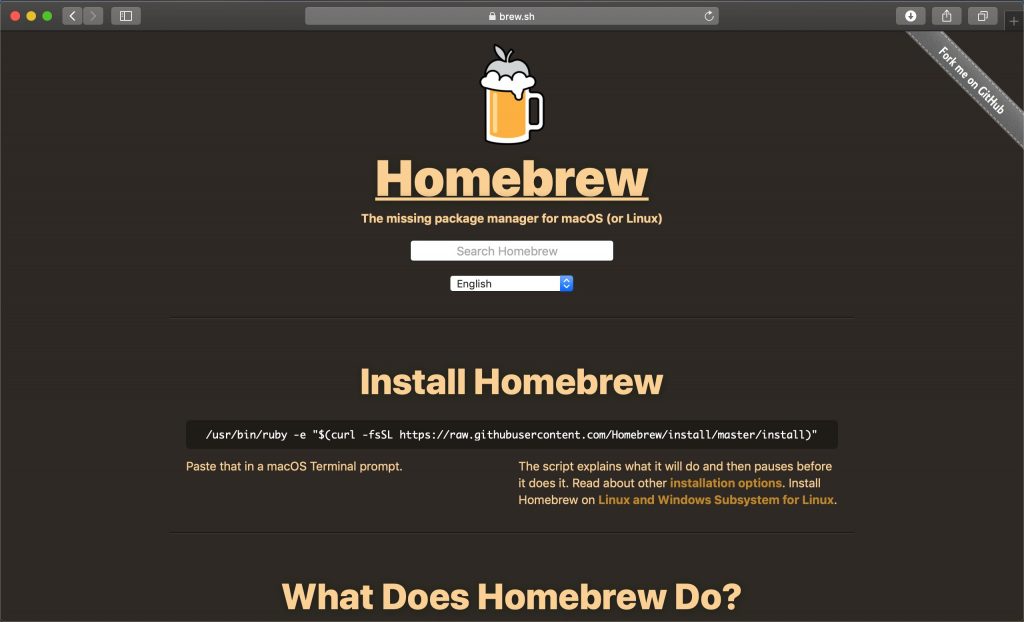
Start by installing Homebrew, head to http://brew.sh, copy the script and paste it into the Terminal.
Once installed, run the following command in the Terminal:
brew install node
brew install watchman
Installing Node will also install npm.
Next step is to install the React Native CLI by typing:
npm install -g react-native-cli
iOS Set Up
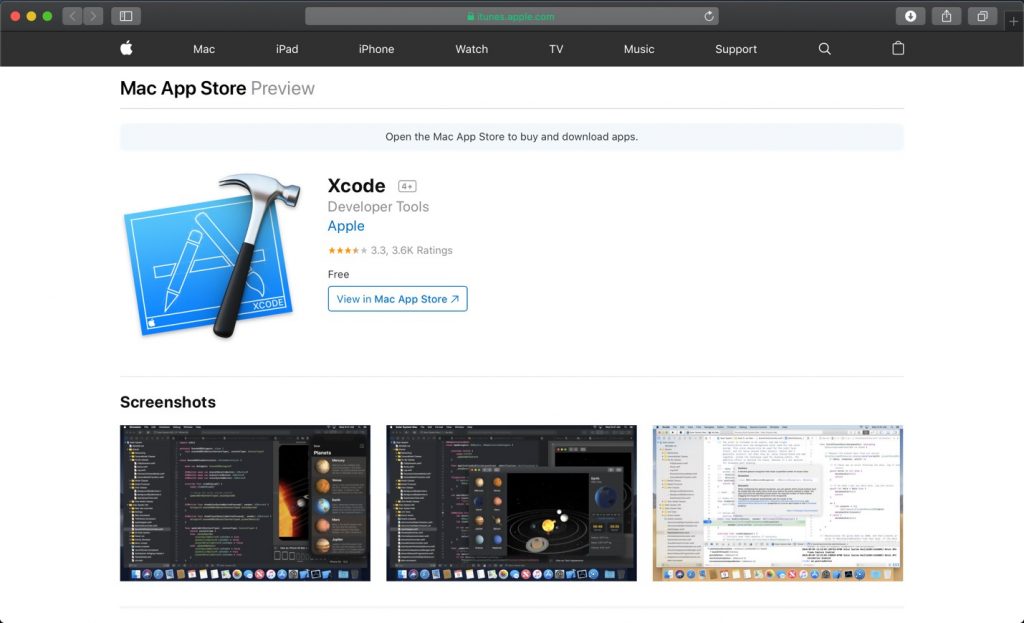
Let’s first start by downloading Xcode, which is necessary for iOS builds.
You will find Xcode at http://itunes.apple.com/us/app/xcode/id497799835?mt=12, click “View in Mac app store” to download and install. Or open the Mac App Store and search for “Xcode”.
Next, install Xcode Command Line Tools. Open Xcode and choose “Preferences…” from the Xcode menu on the upper left corner of the screen. The General window will open, go to Locations and toward the bottom, install the Command Line Tools by selecting the latest version from the dropdown.
At this point you are ready to create your first React Native project but if you want to develop for Android too, please follow the following steps.
Android Set up
Let’s focus on downloading what’s needed for Android builds.
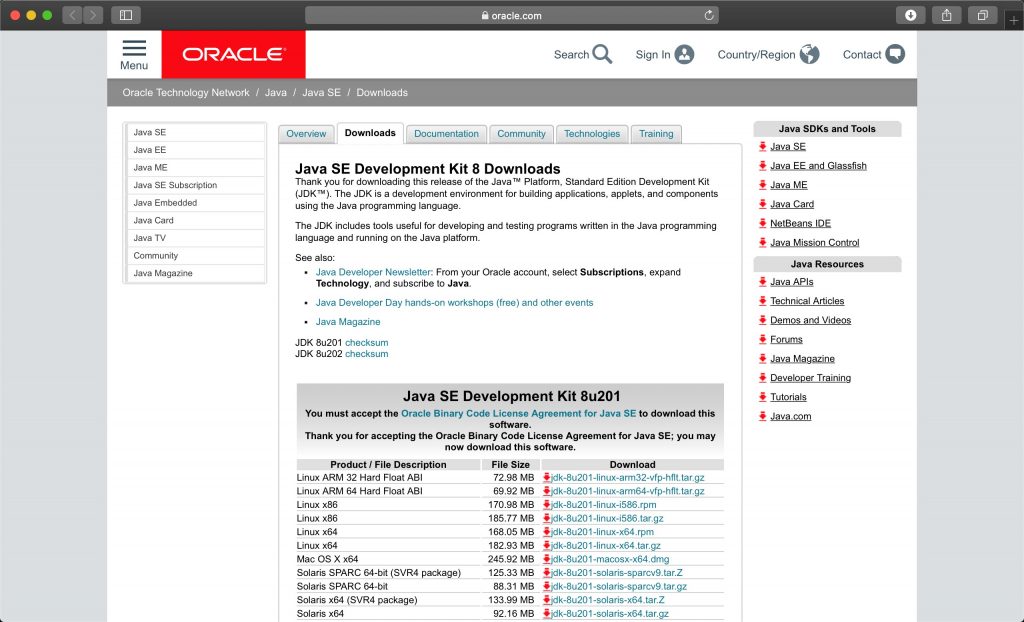
First thing to do is install the Java SE Development Kit (JDK). You can find it at http://www.oracle.com/technetwork/java/javase/downloads/jdk8-downloads-2133151.html.
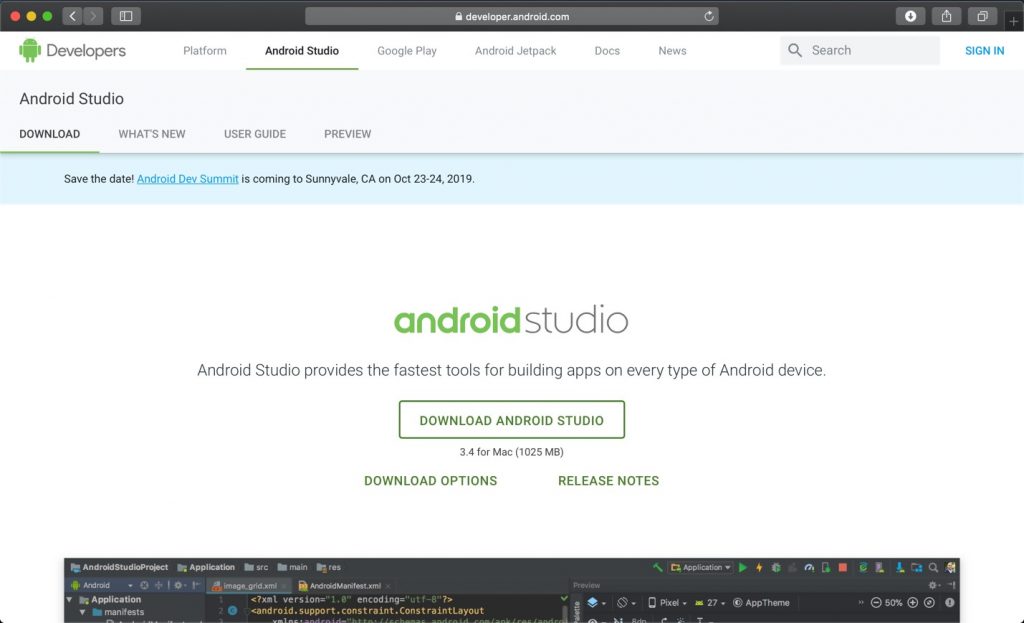
Next, install Android Studio, you can find it at http://developer.android.com/studio/index.html.
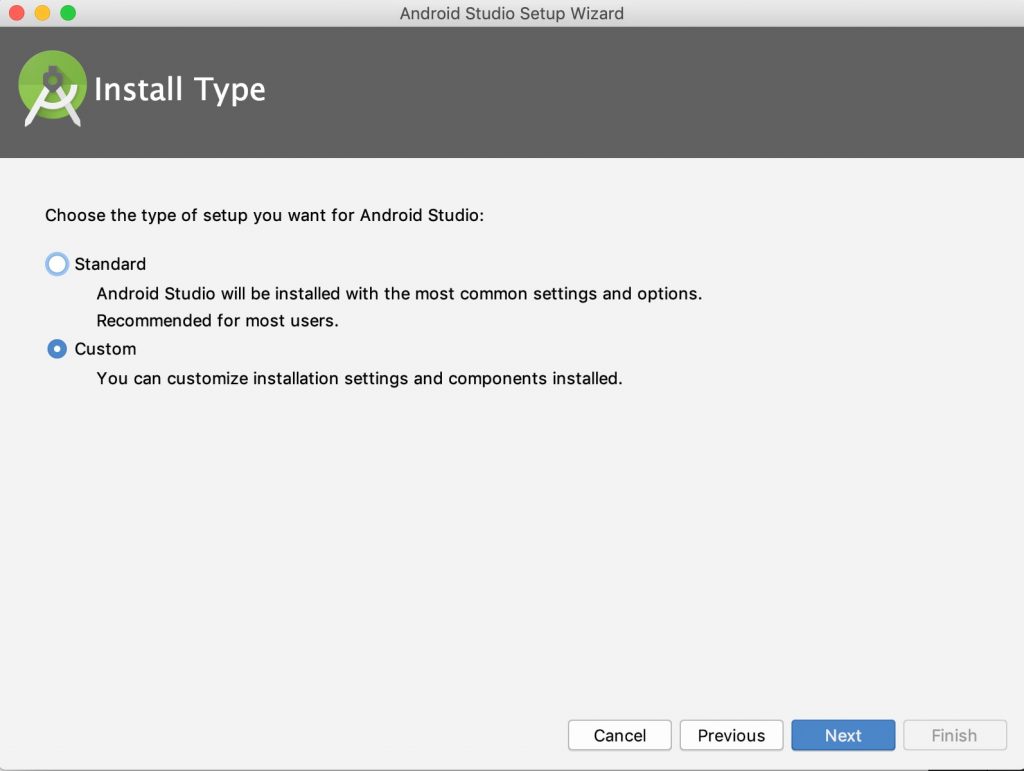
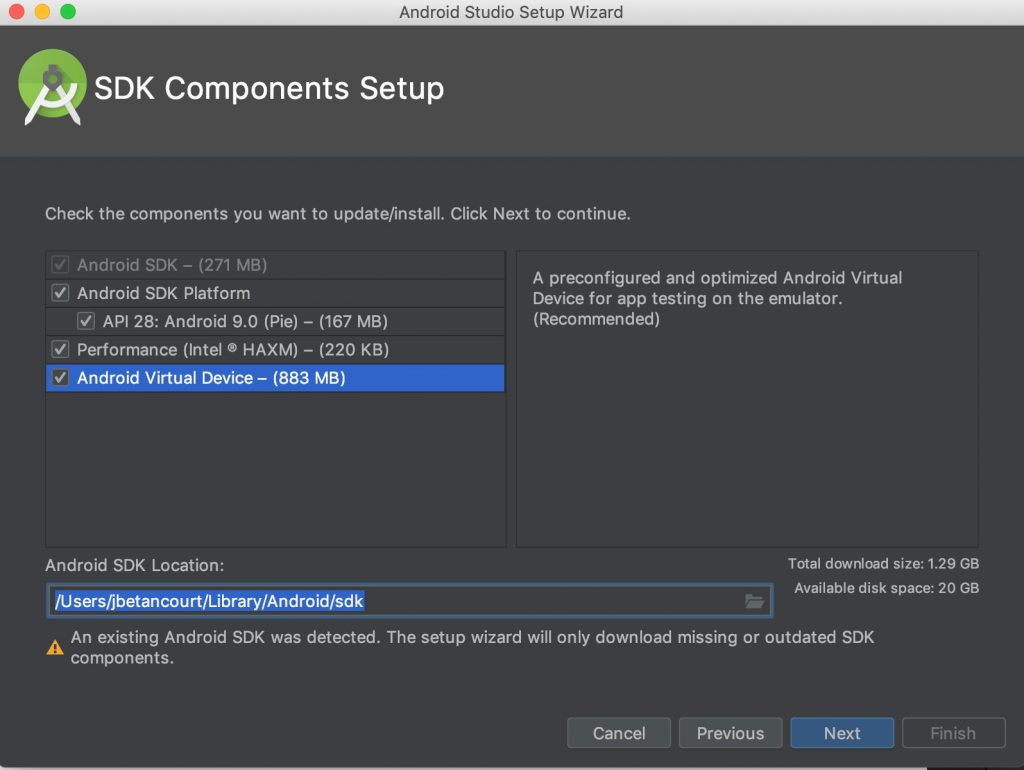
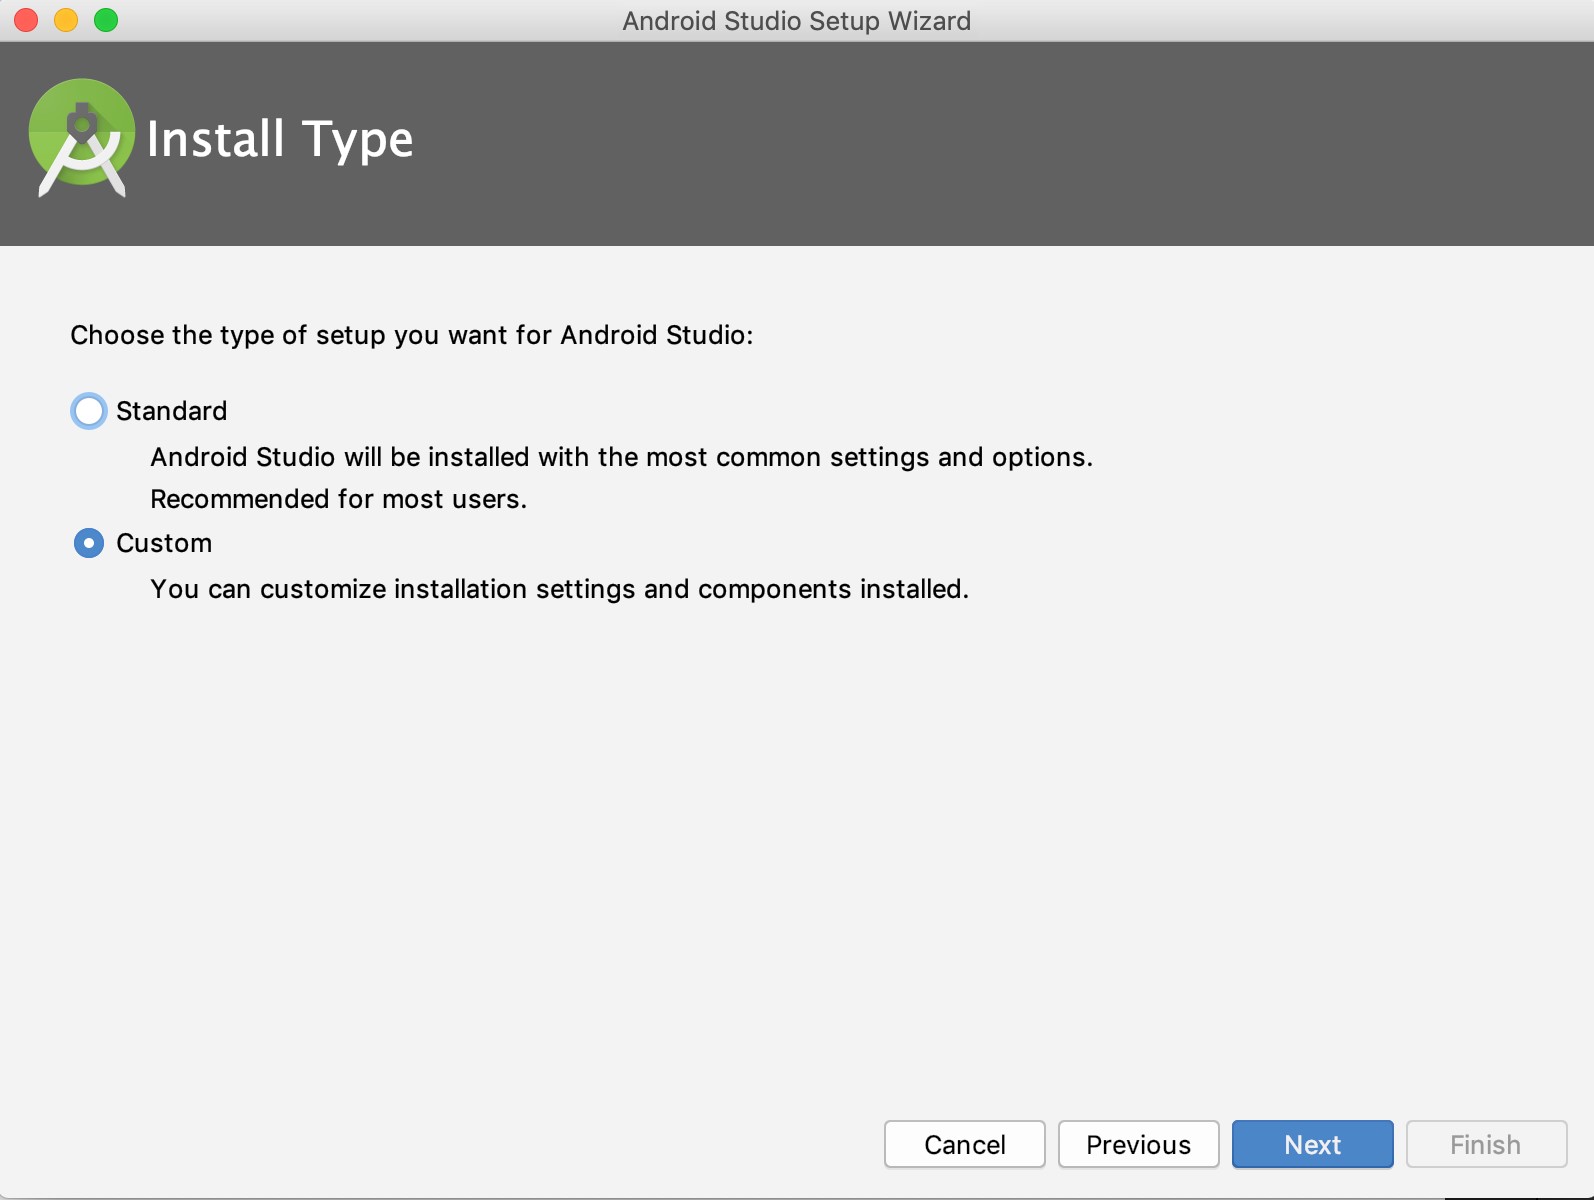
Once installed open Android Studio, the Android Studio Setup Wizard will open. Click “Next” and when asked to choose between “Standard” and “Custom” installation, pick “Custom”.
Click “Next” and choose the theme you would like, then click “Next”. At this point it will ask you to check the components you would like to download. According to the React Native documentation, check Android SDK, Android SDK Platform, Performance (Intel HAXM) and Android Virtual Device.
(I had Android Studios already install and that is why I got a warning at the bottom.)
Click “Next” and leave the Emulator settings on the recommended setting and click “Next”, then “Finish”.
There are a couple more steps left.
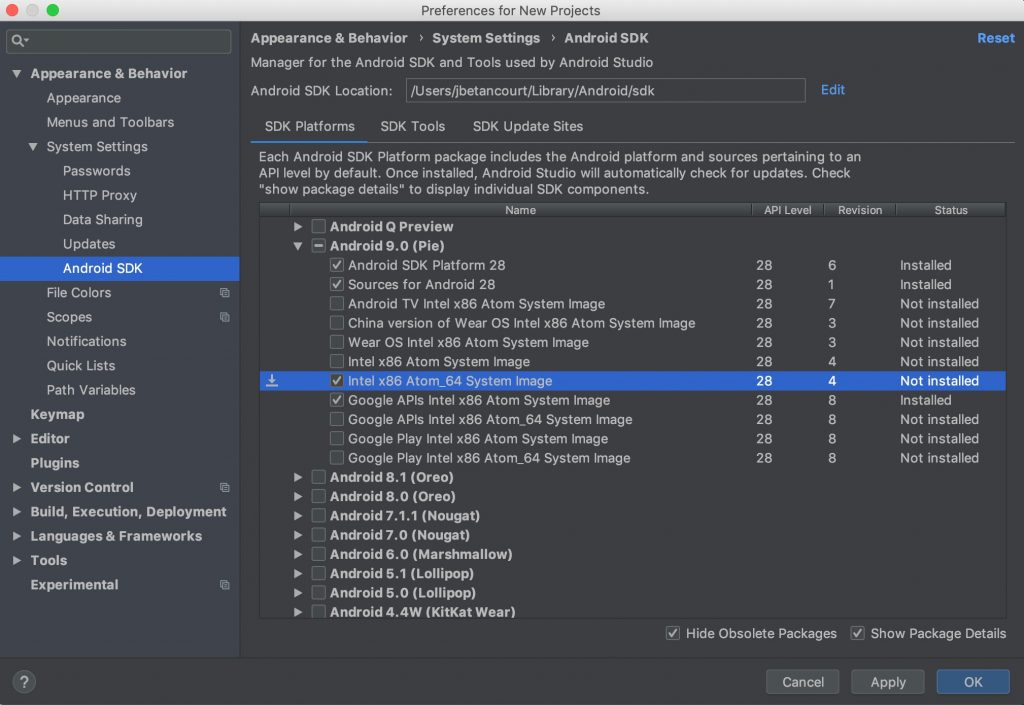
Open Android Studio and in the lower right side of the window, click Android Studio click on “Configure” and “SDK Manager”.
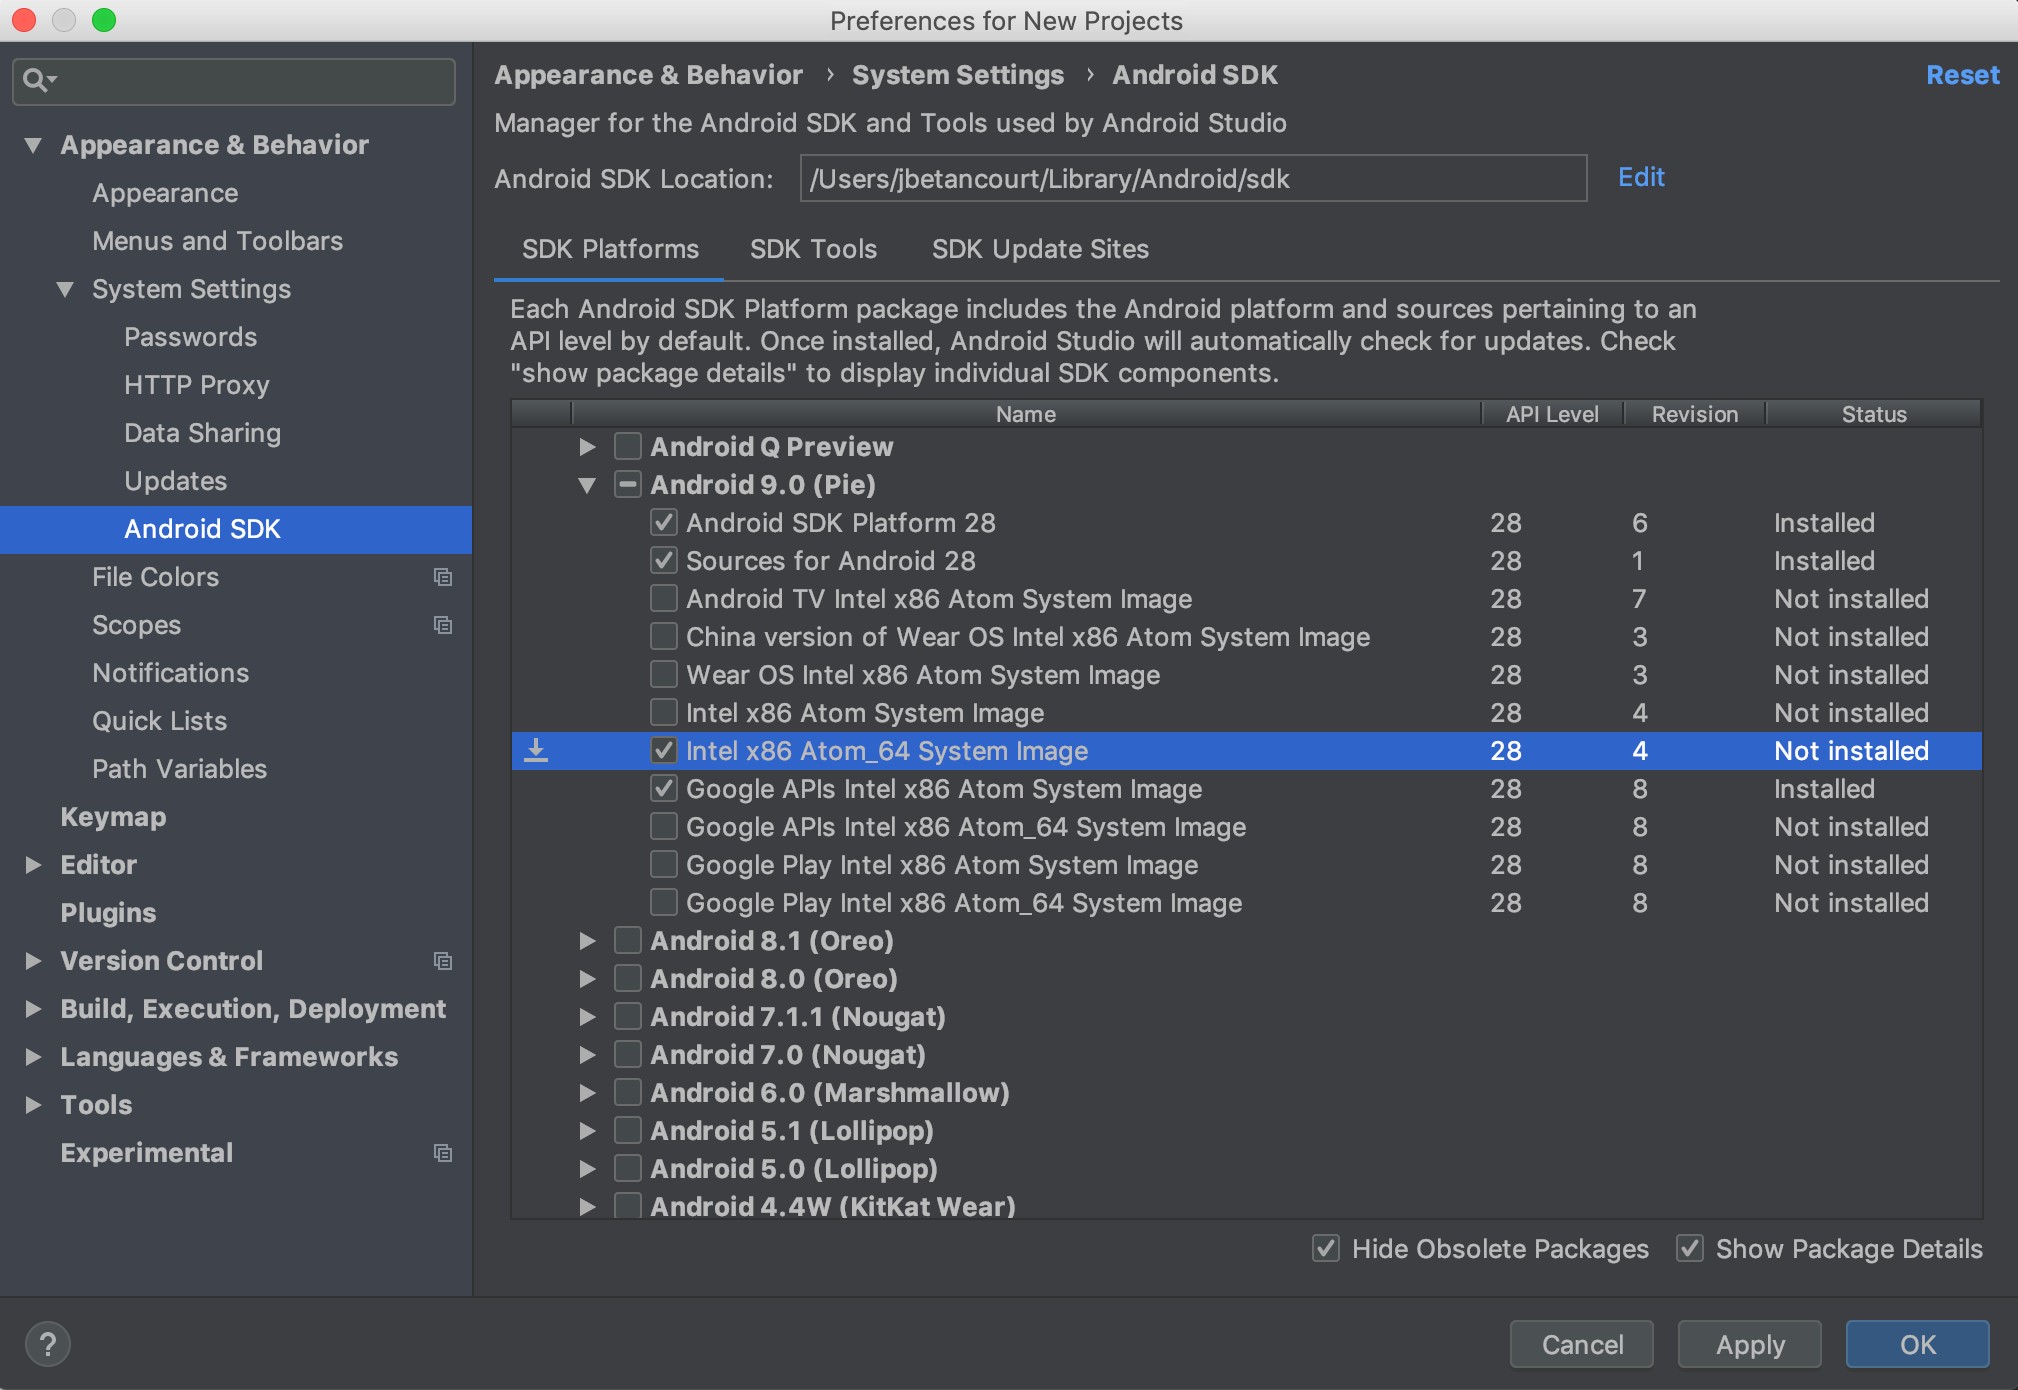
Select the “SDK Platforms” tab, make sure you have “Show Package Details” checked on the bottom right side of the window. Select Android 9.0 (Pie) and make sure Android SDK Platform 28, Intel x86 Atom_64 System Image and Google APIs Intel x86 Atom System Image are checked.
Then click on the “SDK Tools” tab, making sure “Show Package Details” is checked on the lower right side of the window. Look under “Android SDK Build-Tools 29-rc2”, make sure 28.0.3 is selected.
Now click “Apply”, accept the user agreements and install.
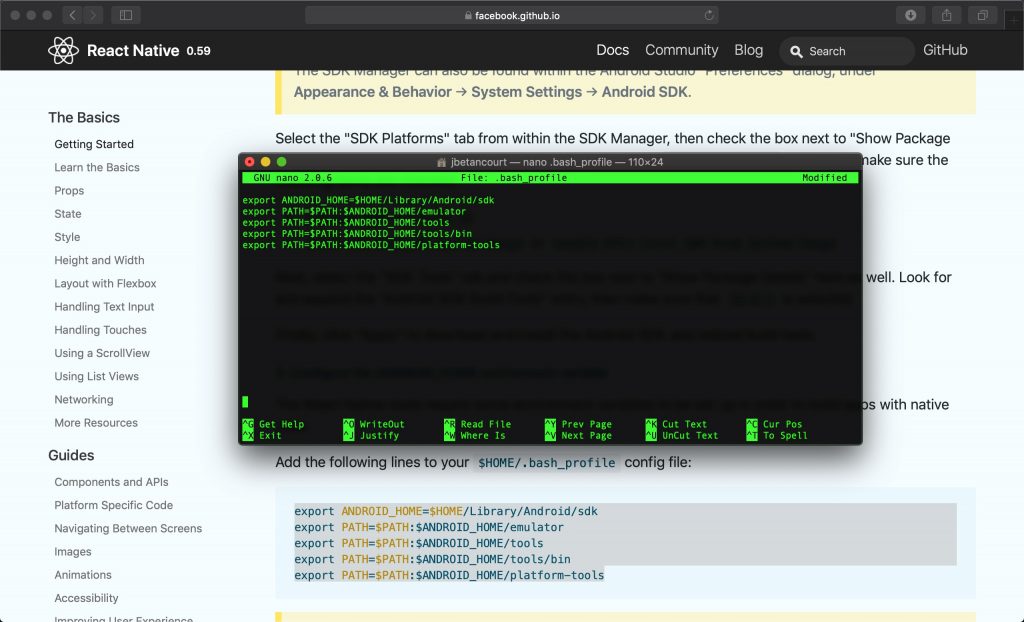
Last step is to add a few lines to your “.bash_profile”. Open up Terminal and type:
nano .bash_profile
Then add the following lines:
export ANDROID_HOME=$HOME/Library/Android/sdk
export PATH=$PATH:$ANDROID_HOME/emulator
export PATH=$PATH:$ANDROID_HOME/tools
export PATH=$PATH:$ANDROID_HOME/tools/bin
export PATH=$PATH:$ANDROID_HOME/platform-tools
To save the changes simply press “Control” and “X”. You will be asked to save changes, hit “Y” and then “Enter” to exit.
You’re all set for iOS and Android development on your Mac.
Windows Installation
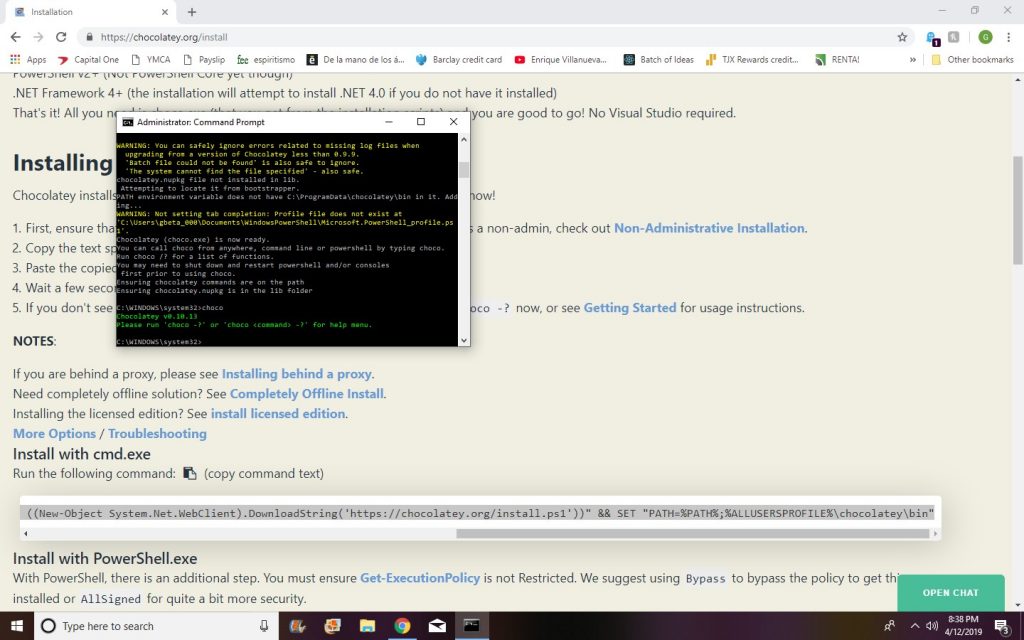
Begin by installing Chocolatey, which can be found at http://chocolatey.org/install. Copy the command under “Install with cmd.exe” and paste it into the Command Prompt.
To open the Command Prompt, search for “cmd” in your Start menu, right click on it and select “Run as administrator”. A pop up will open asking for permission, select “Yes”. Copy the command provided into the Command Prompt and install.
Ensure that it is installed by typing:
choco
This will return the version and a command for the help menu.
Then type:
choco install -y nodejs.install python2 jdk8
After that, it is time to install the React Native CLI by typing the following into the Command Prompt:
npm install -g react-native-cli
I noticed that when I tried to do this, I got an error saying “npm” was not a recognized command. Restart your computer, open cmd as an administrator and try again.
Next, install Android Studio. You can find it at http://developer.android.com/studio/index.html. Open Android Studio, the Android Studio Setup Wizard will open. Click “Next” and when asked to choose between “Standard” and “Custom” installation, pick “Custom”.
(This window, and a few of the following, are screenshots taken on a Mac.)
Click “Next” and choose the theme you would like, then click “Next”. At this point it will ask you to check the components you would like to download. According to the React Native documentation, check Android SDK, Android SDK Platform, Performance (Intel HAXM) and Android Virtual Device. Click “Next” and leave the Emulator settings on the recommended setting and click “Next”, then “Finish”.
(Ignore the warning. This image is a screenshot from my Mac and I had previously installed Android Studios.)
Open Android Studio and in the lower right side of the window, click on “Configure” and “SDK Manager”.
Select the “SDK Platforms” tab, make sure you have “Show Package Details” checked on the bottom right side of the window. Select Android 9.0 (Pie) and make sure Android SDK Platform 28, Intel x86 Atom_64 System Image and Google APIs Intel x86 Atom System Image are checked.
Then click on the “SDK Tools” tab, making sure “Show Package Details” is checked on the lower right side of the window. Look under “Android SDK Build-Tools 29-rc2”, make sure 28.0.3 is selected.
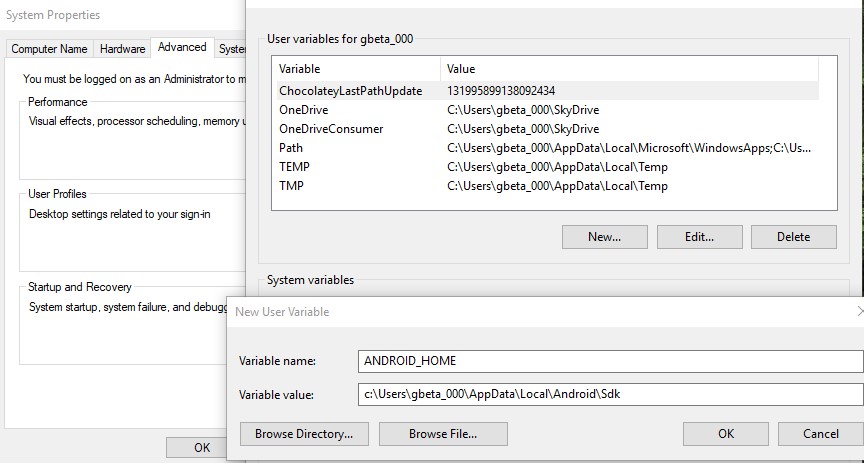
Next search for “Environment variables” in the Start menu, and select “Edit the system environment variables”. When the window opens, click on the “Advanced” tab and towards the bottom select the “Environment Variables”. Under “User variables for YOUR_USERNAME”, click “New” and add the following:
Variable name = “ANDROID_HOME”
Variable value = “c:\Users\YOUR_USERNAME\AppData\Local\Android\Sdk”
You can find the location of the SDK by looking in the “SDK Manager” settings of Android Studio.
Next select “Path” in the “User variables for YOUR_USERNAME” and select “Edit”. A new window will open, click “New” and add the following:
c:\Users\YOUR_USERNAME\AppData\Local\Android\Sdk\platform-tools
Close the “Edit environment variable”, “Environment Variables” and “System Properties” windows by clicking “Ok”.
You are all set! Let’s begin by creating an Expo project, if you decide to use only React Native, please skip ahead.
Creating Expo Project
From here on out I will be working on a Mac, the steps will be the same on Windows but I will not be using the Command Prompt. I will be using commands, such as “clear”, that will work in the Terminal but may not work in the Command Prompt.
Open up a new Terminal and head to the directory you wish to save the project in.
I like to save my projects onto my Desktop, so I will type:
cd Desktop
Once in the directory of your choice, type:
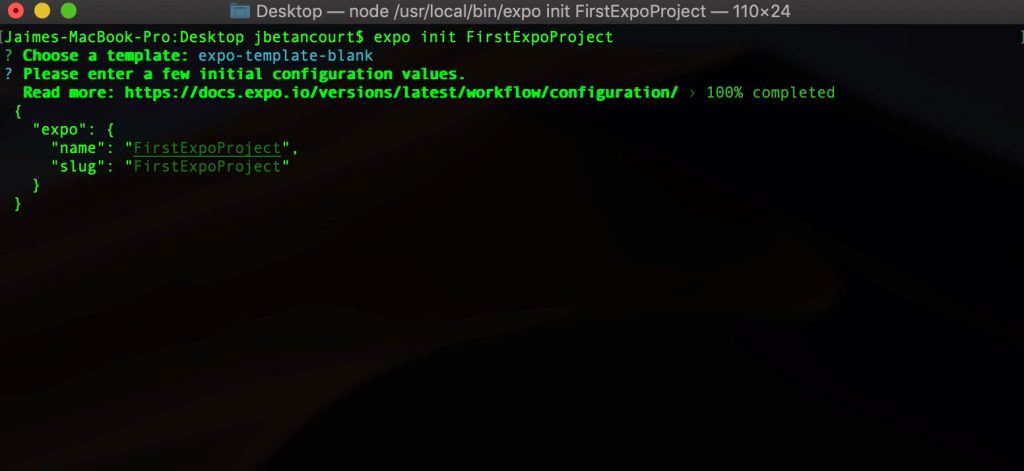
expo init FirstProject
“expo init” initializes a directory called “FirstExpoProject”. If you prefer to name the project something else, replace “FirstExpoProject” with the name of your choice.
There will be an option given to “Choose a template”, select “Blank” and press “Enter”.
Next, you are prompted to enter “The name of your app visible on your home screen”. I will type “FirstExpoProject” and press “Enter”.
Congrats! You created your first React Native app. To enter the folder type:
cd PROJECT_NAME
And the follow to start it:
expo start
Or
npm start
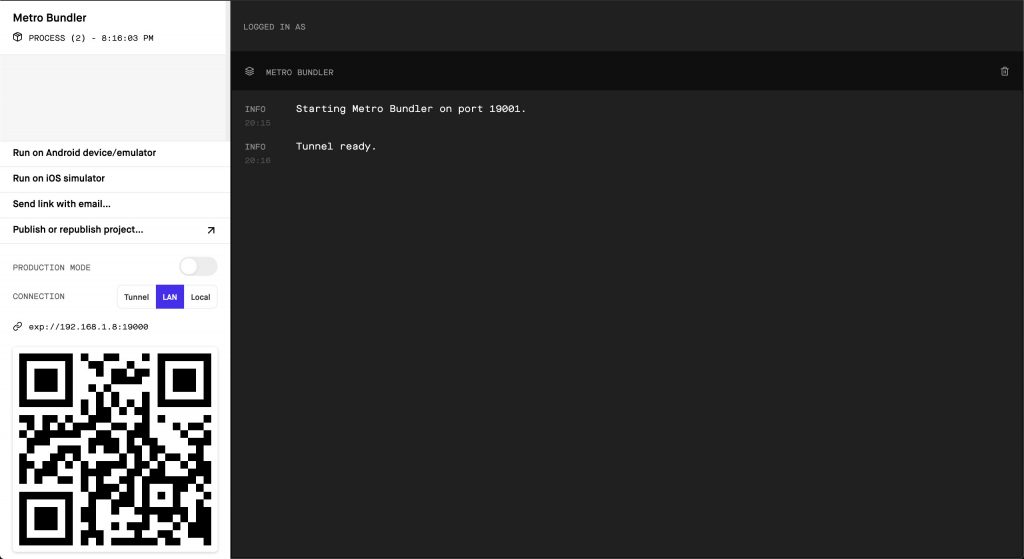
A new tab will open in your web browser, called the Expo Dev Tool. Depending on your computer this may take some time.
You will have a few options to view the app.
One way to view the app is to use the QR code. In the Terminal and Expo Dev Tool you will see a QR code. You can scan the code with the Expo app on Android or the iPhone’s camera.
Make sure your computer and phone are on the same network when the “Connection” in Expo Dev Tools is set to “LAN”. If you select “Tunnel”, then both devices can be on different networks.
Another way to view the app is to type “e” in the Terminal, allowing you to send an email or text message with a link to the app. You will have the same option in the browser.
And the final option I will discuss, is to open the app in the Android emulator or iOS simulator, which requires you to first install Android Studio and Xcode. If you want to do this, please look at the section titled “React Native CLI”.
Once you have it running it will look like this:
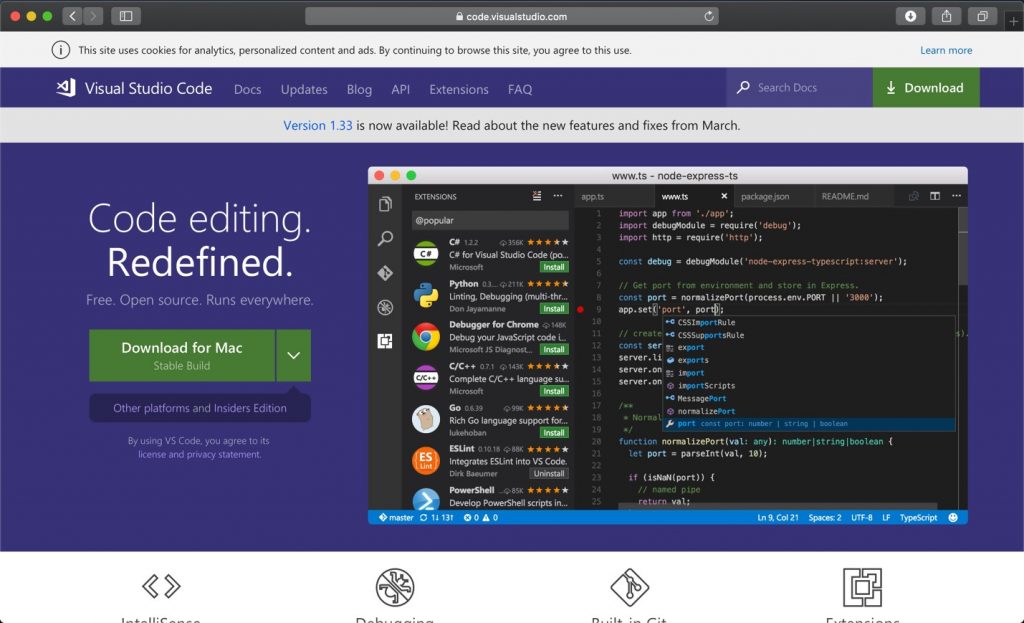
It’s now time to see what we created! You will need a text editor for this part and my personal preference is Visual Studio Code, which can be downloaded here http://code.visualstudio.com/. There are other options, such as Atom and Sublime, for example. Since I will be using Visual Studio Code, some of the following steps may differ if you are using a different editor.
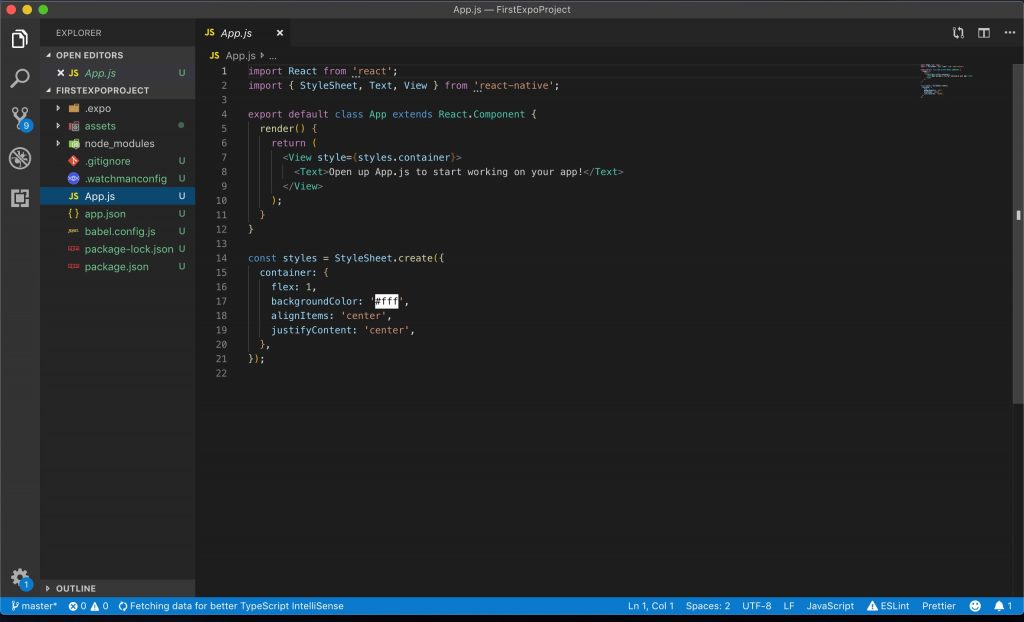
Open Visual Studio Code, and open the “FirstExpoTutorial” project. On the left side of the editor you will see the “Explorer” section. If you do not see it, click on “View” at the top of the screen and then on “Explorer”.
In the “Explorer”, open up App.js file, this is where we will modify the code.
The first line of code imports the default export React from the module react.
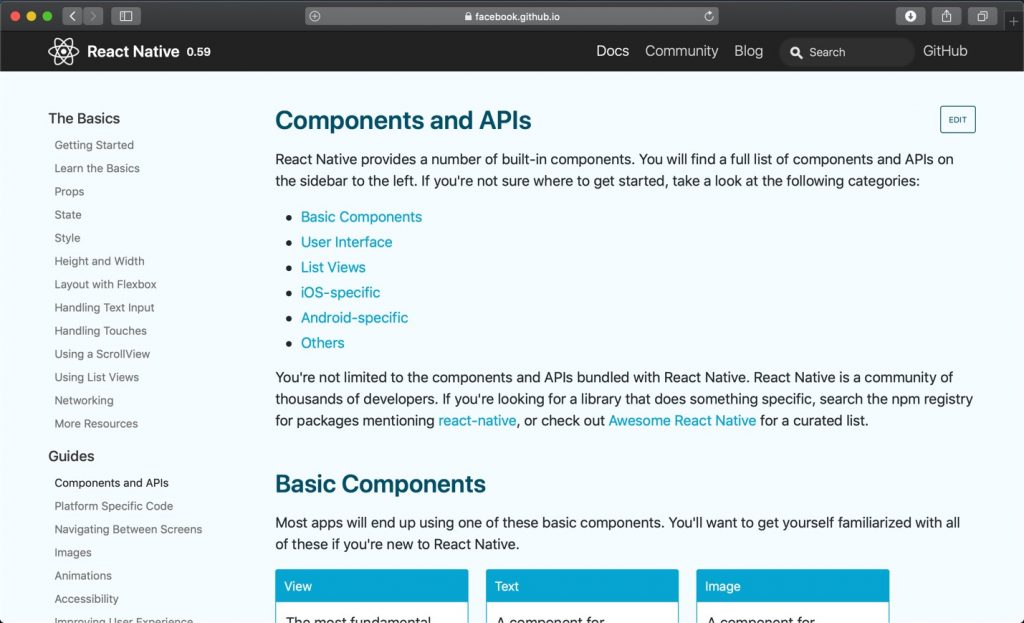
The second line is importing components from React Native. React Native has a bunch of built in components and apis which you can see here, http://facebook.github.io/react-native/docs/components-and-apis.
Next comes the class App, which has the function render(), that returns JSX code, similar to HTML, and is exported.
The JSX consist of a View, a container that supports layout, and Text, a React component for displaying text. Replace the text between the <Text></Text> tags, with:
<Text>Hello World! Welcome to my new expo app!</Text>
Save the file and the app will reload with the new text.
The last block of code you will notice is the constant named styles. This is the styling that is passed to the View component and is similar to CSS styling.
Creating React Native Project
The steps to create a project using the React Native CLI are similar to Expo. Use the command “cd” to move directories. I will use the following command to move to the Desktop directory, but you can choose any directory:
cd Desktop
Once you are in the directory you wish to create the project in, type :
react-native init FirstRNProject
“react-native init” initializes a directory called “FirstRNProject”. You can choose to name your project something else.
During the initialization it may suggest that you use Yarn to speed it up. This is optional but if you want Yarn you can download it at http://yarnpkg.com/en/docs/install#mac-stable. There is a Homebrew option I will use on Mac, type the following in the terminal:
brew install yarn
In Windows either use the Installer or Chocolatey. To use Chocolatey, type the following into the Command Prompt as an administrator:
choco install yarn
Congrats! You created your first React Native app. Now it’s time to run the app. After creating the project, you may have noticed that there are instructions on how to run it. First thing to do is to enter the project folder by typing the following into the Terminal:
cd FirstRNProject
If you are on a Mac, you can run you iOS project two ways. One is to type the following into the Terminal:
react-native run-ios
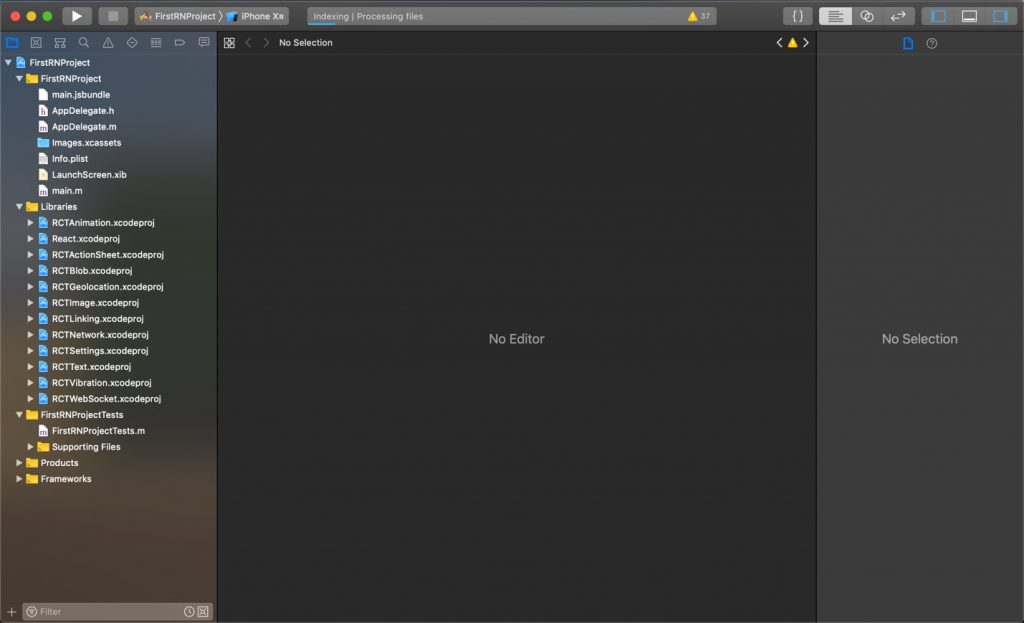
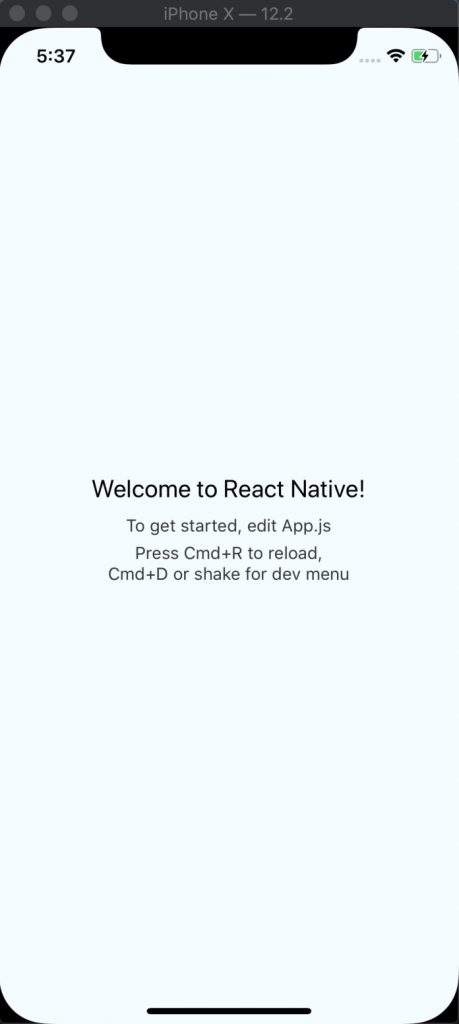
This command will start building your app and will open it on the iOS simulator. Second way to run the project is to open the “YOUR_PROJECT_NAME.xcodeproj” file inside the “ios” folder of the React Native project. Xcode will open up, select the simulator and click on the run button at the top left side of the window.
This is how the app will look on the simulator:
If you are using Windows or Mac and want to run the app on Android, start by opening up Android Studios to start up the emulator before running the command in the Terminal.
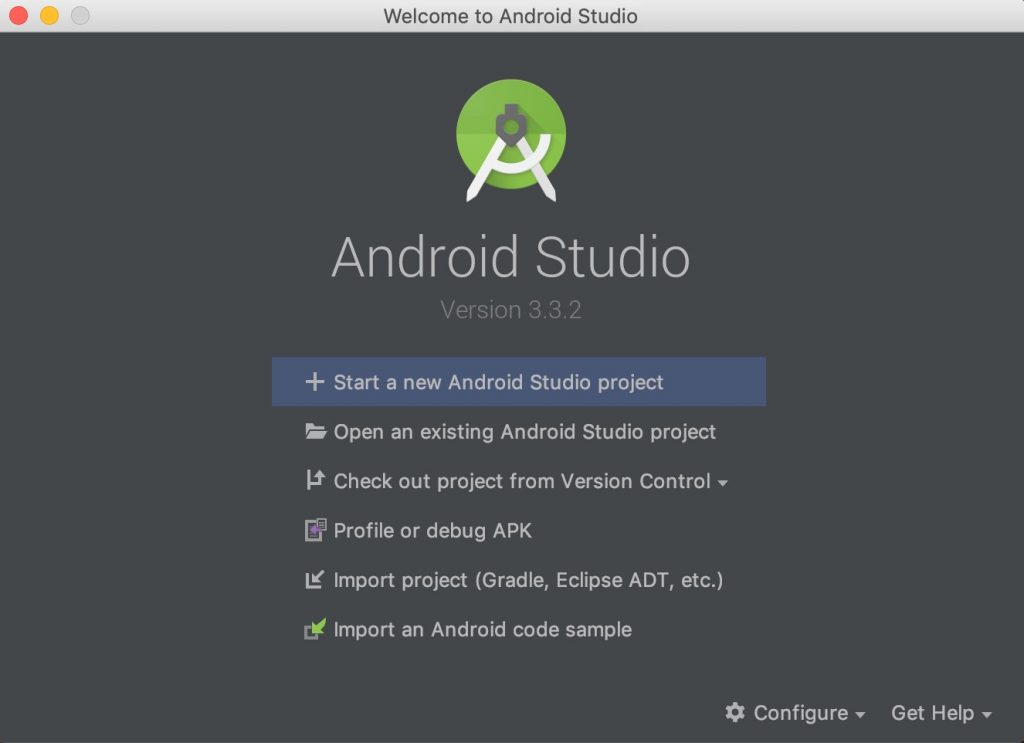
Select “Open an existing Android Studio project” from the “Welcome to Android Studio” window.
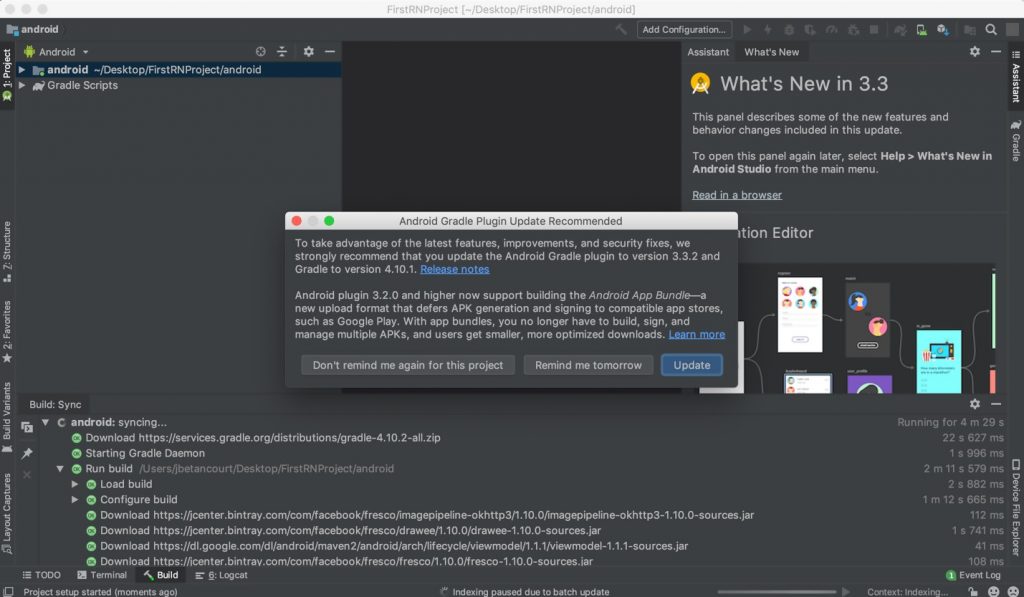
Navigate to the directory where the project is located and the select the “android” folder inside and click “Open”. There may be a popup asking you to update the Android Gradle plugin. Don’t upgrade because it may cause the project not to work, I clicked “Don’t remind me again for this project”.
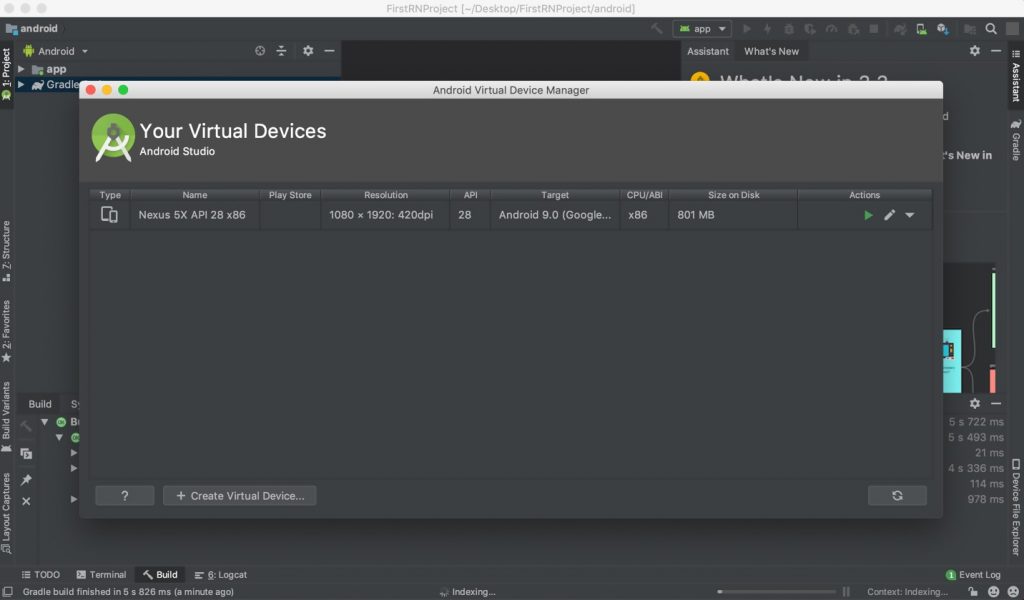
Before running the command in the Terminal, there is one last thing to do and that is to check the AVD Manager. Go to Tools in the top of the screen and click on “AVD Manager”. The Android Virtual Device Manager window will open. I have a device already set up using Android 9.0.
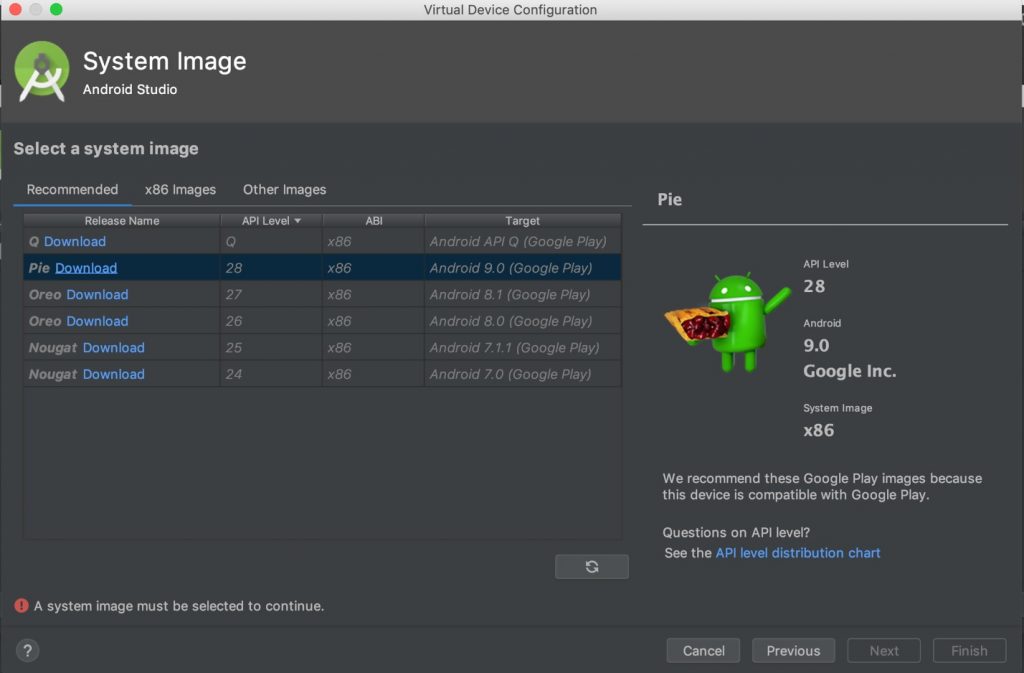
If you don’t see a device or want to create a new one, click on “Create Virtual Device”. Select the device you want and click “Next”. On the following screen select “Pie”, download if needed” and click “Next”.
Give the device a custom name or leave it as default and click “Finish”. Choose a device to run and click on the green play button under “Actions”.
Once the emulator is running, go back to the Terminal and inside the project you created run the following command:
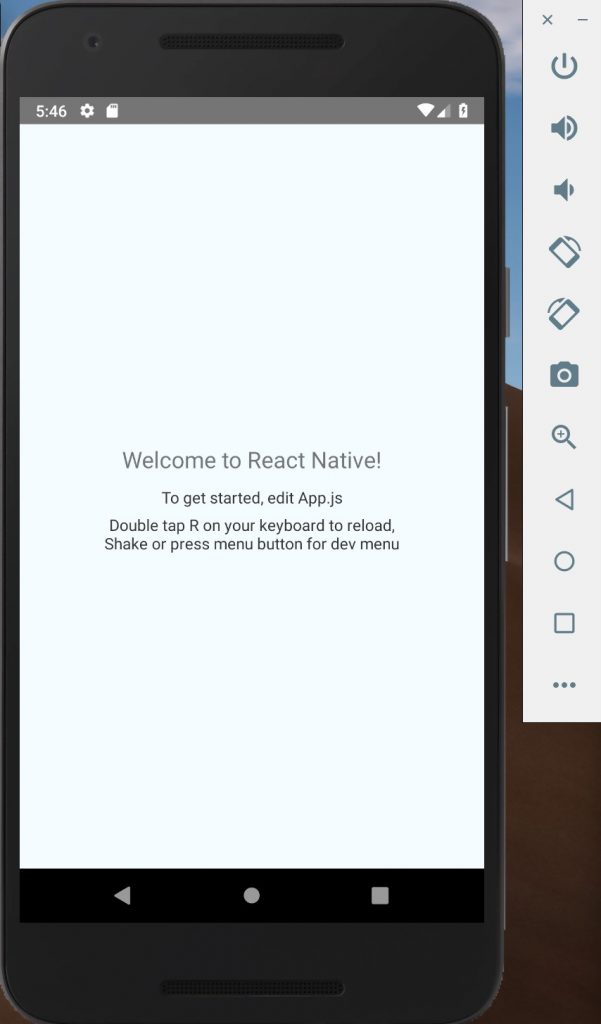
react-native run-android
Here is how the project will look in the emulator:
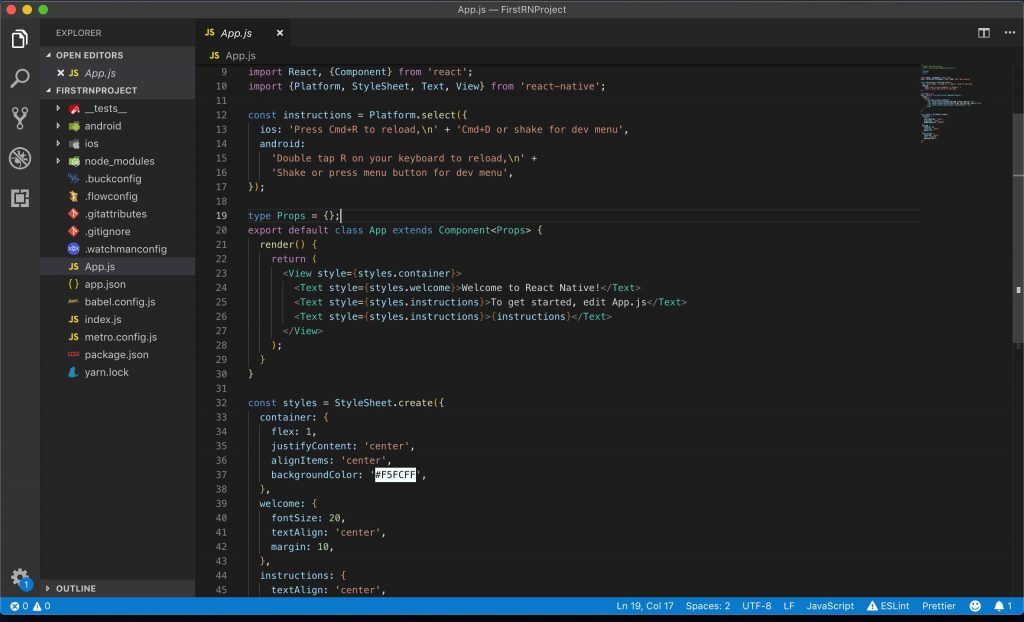
It’s now time to see what we created! You will need a text editor for this part and my personal preference is Visual Studio Code, which can be downloaded here http://code.visualstudio.com/. There are other options, such as Atom and Sublime, for example. Since I will be using Visual Studio Code, some of the following steps may differ if you are using a different editor.
Open Visual Studio Code, and open the FirstTutorial project. On the left side of the editor you will see the Explorer section. If you do not see it, click on “View” at the top of the screen and then on “Explorer”.
Since the project was created with the React Native CLI, you will notice that this project has more folders than an Expo project. Two folders that stand out are the Android and iOS folders, which will give you access to native code.
In the Explorer, open up App.js file, this is where we will modify the code.
The first line of code, “import React from ‘react’”, imports the default export React from the module react.
The second line is importing components from React Native. React Native has a bunch of built in components and apis which you can see here, http://facebook.github.io/react-native/docs/components-and-apis.
The React Native project will then have a constant named “instructions”. What it does is determine which kind of phone that app is running on and will display text accordingly.
Next comes the class App, which has the function render(), that returns JSX code, similar to HTML, and is exported.
The JSX consist of a View, a container that supports layout, and a few Text, a React component for displaying text. Delete the bottom two, then replace the text between the <Text></Text> tags, with:
<Text>Hello World! Welcome to my new React Native app!</Text>
Save the file and if the text on the simulator/emulator does not change, simply reload the app. To do so on the iOS simulator press “Command” and “D” and click reload. In the Android emulator press “Command” and “M” if running it on Mac or “Control” and “M” on Windows.
The last block of code you will notice is the constant named styles. This is the styling that is passed to the View component and is similar to CSS styling.
Now What?
Congratulations! You have installed everything necessary to create a React Native project, started the project and modified the code. Take a look at the React Native documentation or Expo documentation and play around with the project. Add more text, change the background color, add an image or a button. This is just the beginning, in no time you will be creating amazing apps and publishing them for the world to see.

